
ADDING & UPDATING RECORDS
Quick Links
to Topics
included in this
article:
ADDING CHARACTERS AND LOCATIONS
ADDING SYNOPSISES, FLASHBACKS & NOTES
To add a new record on the Issues form, click on the Add New button on the toolbar:
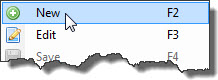
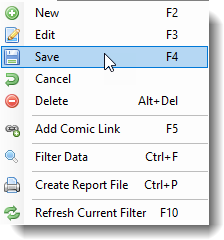
Or choose New from the Comics pull-down menu, or use the shortcut key F2
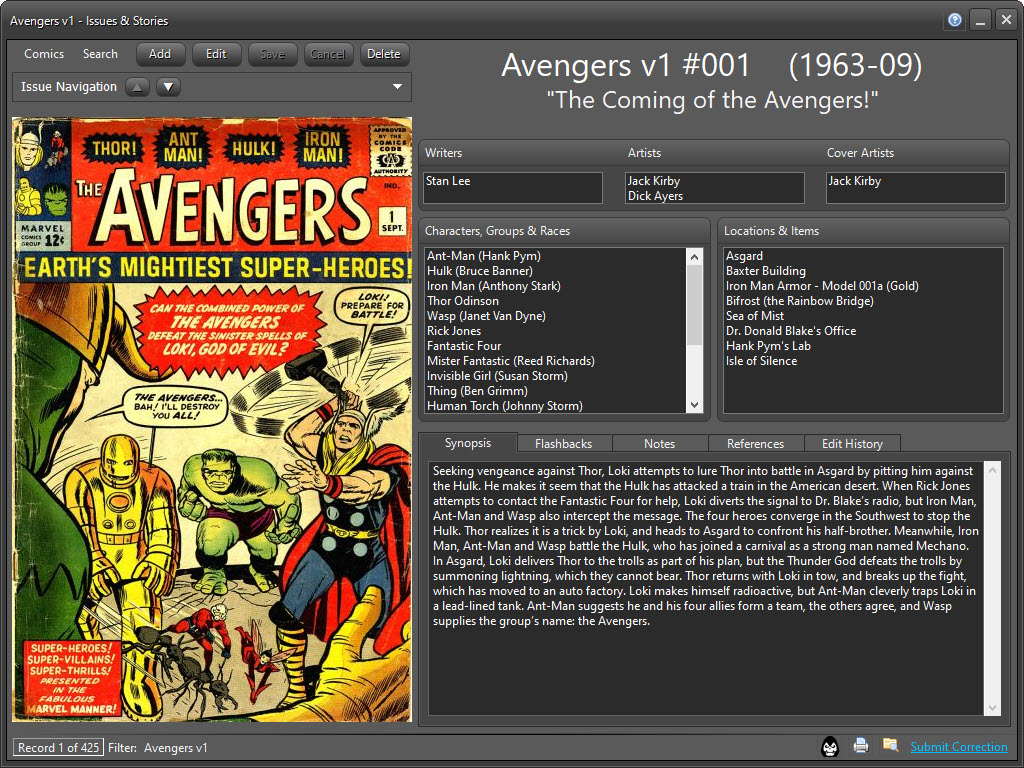
This puts the program into editing mode, and turns many read-only fields into editable textboxes.
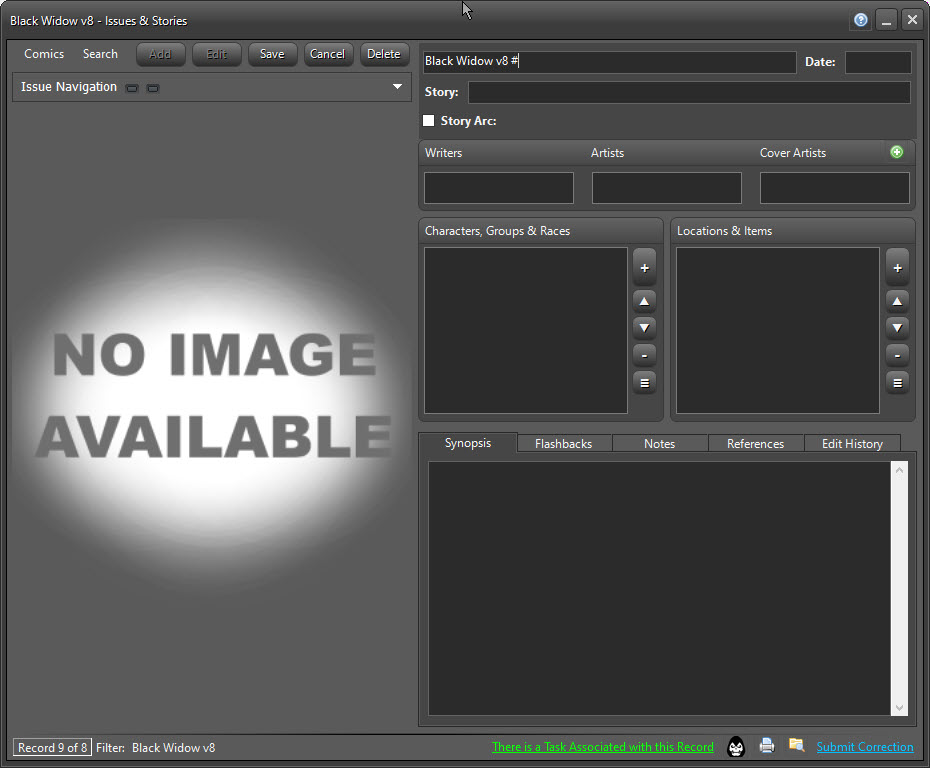
The program is written to use the Tab/Space method of data entry. This means that the fields and buttons are ordered so that you can use the TAB key to quickly move to the next field or button without having to use the mouse. The SPACEBAR acts as the ENTER key to activate buttons without having to click on them with the mouse. When entering a new record, the program automatically starts in the Title and Issue field.
Intuitively, the program remembers the name of the title the program was previously focused on and fills in most of the information ahead of time, as shown below:
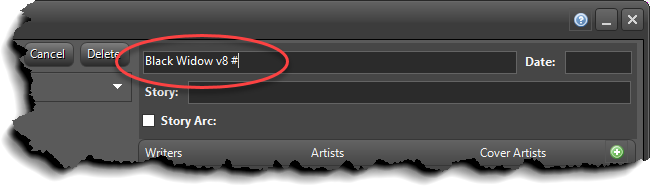
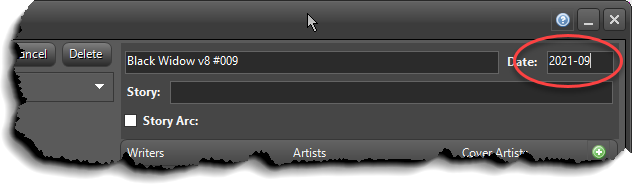
All you have to do is type in the issue number, then hit TAB to move to the Date field.
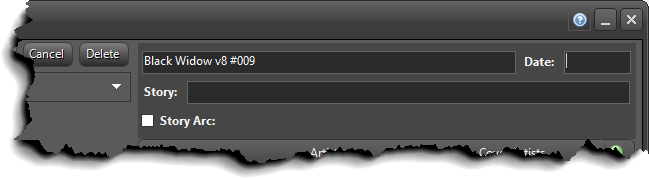
NOTE: Issue numbers are always in 3-digit format. If you are entering issue #1, it should be entered as #001. If there are multiple stories within the issue, they use the designator of -1, -2, etc. For example, Amazing Spider-Man v1 #001-1 is the first story in the issue and Amazing Spider-Man v1 #001-2 is the second.
Dates are entered in YYYY-MM format. Meaning April, 1992 would be entered as 1992-04 . This format is used so that the program can sort by dates more effectively. As you type in the date, the program will automatically generate the dash between year and month. If there is no month (Annual issues quite often have no month listed) after typing the year, backspace once to remove the dash.
Enter the story title. If the story has an ampersand (&) in it, type it in twice. The display labels will recognize the two as one. This is a programming shortcoming regarding using labels for display. Alternately, you can use the word "and".
NOTE: It in not necessary to remember to put quotation marks around story titles. The program will automatically add them when the record is saved.
If the story has no title, leave the field blank. When the record is saved, it will automatically fill in No Story Title.
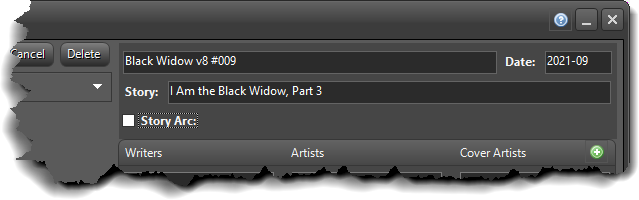
If the story is part of a Story Arc or Crossover, check the box to reveal the Story Arc entry fields.
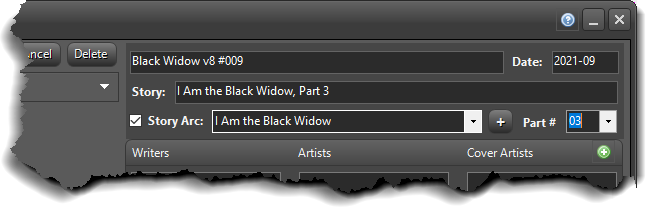
Begin typing
to either choose an existing story arc from the dropdown or to create a new one.
If the required arc does not already exist, click on the  button to quickly add a new story arc to the
database. This can
be later edited on the Story Arcs form. If the story
has a designated part #, enter it. If left blank, the part number will not
display on the saved record.
button to quickly add a new story arc to the
database. This can
be later edited on the Story Arcs form. If the story
has a designated part #, enter it. If left blank, the part number will not
display on the saved record.
Hit TAB to focus on the Add Creators button, then hit SPACEBAR or use the mouse to click it.
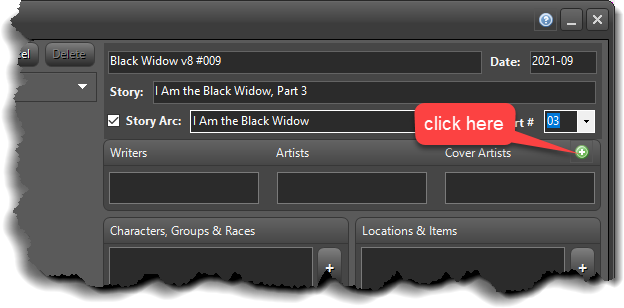
A new form will appear.
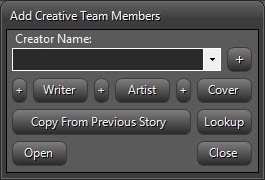
Begin typing to choose an existing creator. If the
required creator does not already exist, click on the button next to
the dropdown textbox to
quickly add a
new creator to the database in the background.
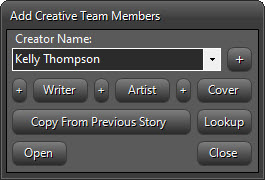
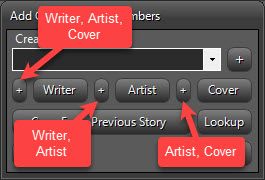
Once you've selected a name, TAB to the appropriate creative team role (Writer, Artist, Cover Artist) and then hit SPACEBAR to add it to the list.
The  buttons are for entering creators into
multiple roles simultaneously. For example, clicking on the first button will add the
creator to the Writers, Artists, and Cover Artists lists. Clicking on the second
will add
the creator to the Writer
and Artist lists. Clicking on the third button
will add the creator to the Artist and Cover Artist lists. See below for
a more visual representation:
buttons are for entering creators into
multiple roles simultaneously. For example, clicking on the first button will add the
creator to the Writers, Artists, and Cover Artists lists. Clicking on the second
will add
the creator to the Writer
and Artist lists. Clicking on the third button
will add the creator to the Artist and Cover Artist lists. See below for
a more visual representation:
If the entire team on the current story is the same as the
previous story, click on  to automatically enter the same team
members into the current story.
to automatically enter the same team
members into the current story.
After you have finished entering the creative team, hit the Close button.

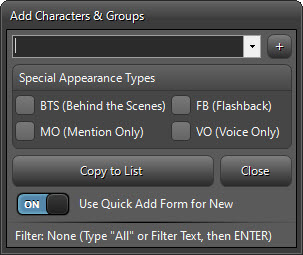
Hit TAB to focus on the Add Characters button, then hit SPACEBAR to activate it. Alternately, click on it with the mouse.
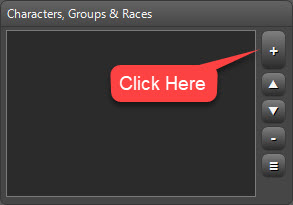
The Add Characters window opens. By default it is empty. There are filter instructions at the bottom of the form.

Type "All" (without the quotation marks) into the dropdown box, then click the ENTER key on your keyboard to load All Character/Group/Race records. The Filter note will update.
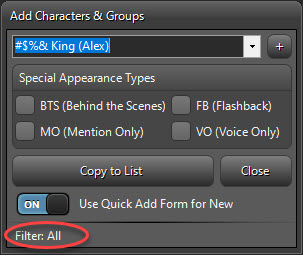
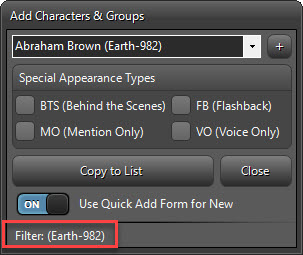
To load just a subset of data to the form, type the filter text and click ENTER.
For instance, if you only needed characters listed from Earth-982, you would type that into the box and click ENTER.
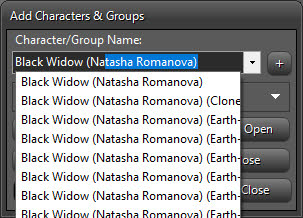
Once the appropriate filter has been applied, begin typing the name of the character, group, or race you want to add to the list. The program intuitively begins to filter the available records to what you type.
If
what you're looking for doesn't appear, you can quickly add it to the database
by clicking on the
button to the right of
the text box.
A prompt will ask if the new entry is a character.
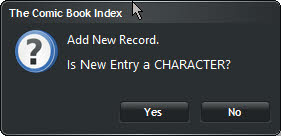
Choosing Yes or No will set the category of the new entry to either Characters or Groups , respectively, to allow the database to properly categorize the new entry.
If Quick Add Form for New is toggled ON, the Quick Add window will open.
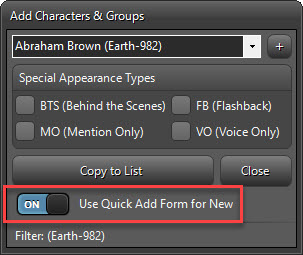
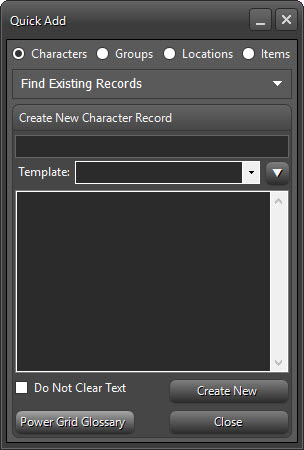
Go to the Quick Add page for details on using the Quick Add window.
After selecting a character, you can right-click in the dropdown for additional menu options:
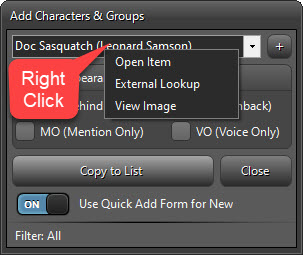
Click Open Item to open the selected Character/Group record.
You can view the character image by clicking View Image
If the character you're adding isn't fully identified in the issue you're indexing, click External Lookup, enter a search word (ie. "Smith") in the Find box and Click the binoculars to search. This will provide a list of all characters and groups with "Smith" in the name. You can then check these results to see if an existing character applies.
NOTE: By default the Find field will pre-fill with the Selected name from the Add Characters window. You can erase and replace as needed.
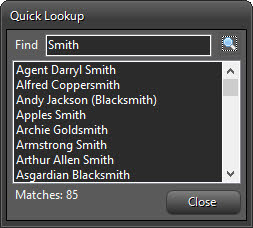
Right-Click and choose Preview Image to see a thumbnail of the character image (if one exists), or Open Selected to bring up a new Characters window with details.
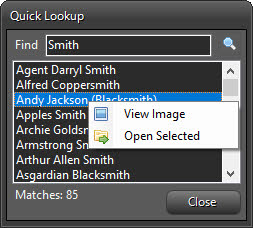
If you find the character you're looking for, Double-Click on the name and it will be sent to the Add Characters form.
Back on the Add Characters window, if the appearance type is anything besides a standard in-story appearance, click on the appropriate Special Appearance Type checkboxes.
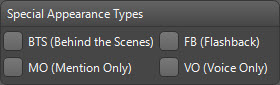
Checking any of these boxes will add the appearance type (BTS, FB, MO, VO) behind the character name in parenthesis. The below example would create Iron Man (Anthony Stark) (Earth-982) (BTS)
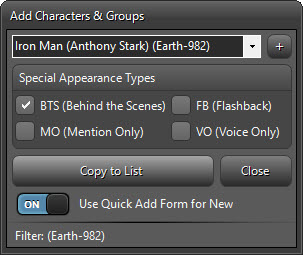
Click the  button to add the character to the list. The program
will then reset the focus
to the dropdown, where you can begin typing in the next name. Once you
get a handle on this functionality, characters can be entered very swiftly. The end result
being that all of these characters can be added in less than a minute.
button to add the character to the list. The program
will then reset the focus
to the dropdown, where you can begin typing in the next name. Once you
get a handle on this functionality, characters can be entered very swiftly. The end result
being that all of these characters can be added in less than a minute.

NOTE: If you are adding a Group and characters are listed in the members box on the Groups form, a dialog will pop up asking if you want to automatically add those members to the list.
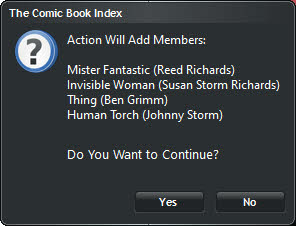
This makes entering teams much faster. Go here for more information.
Once
Characters have been added to the list,
they can be reorganized. Click on a Character to select it, then press
either  or
or  to move
the item up or down in the list.
to move
the item up or down in the list.
Delete a
single character from the
list by clicking  or
clear the entire list by clicking
or
clear the entire list by clicking ![]()
NOTE: The same parameters apply to entering Locations & Items.
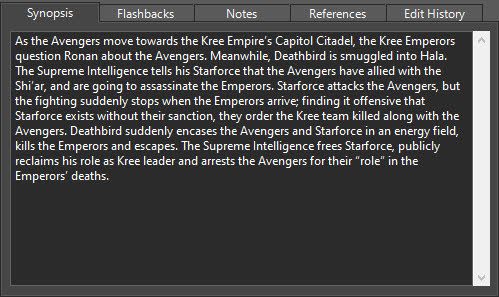
ADDING SYNOPSISES, FLASHBACKS & NOTES
Synopsises, Flashbacks and any Notes about the issue can be entered in the appropriate fields
After all information has been entered, click on the Save button on the toolbar:
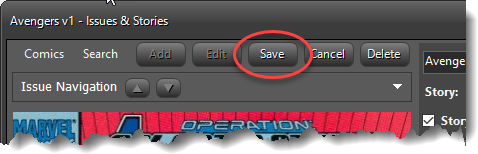
Or choose Save from the Comics pull-down menu, or use the shortcut key F4
This will stop the editing process and save any data to the database.
When in Edit Mode on the Characters & Groups form , if the category is Groups, an additional listbox becomes available to add team members
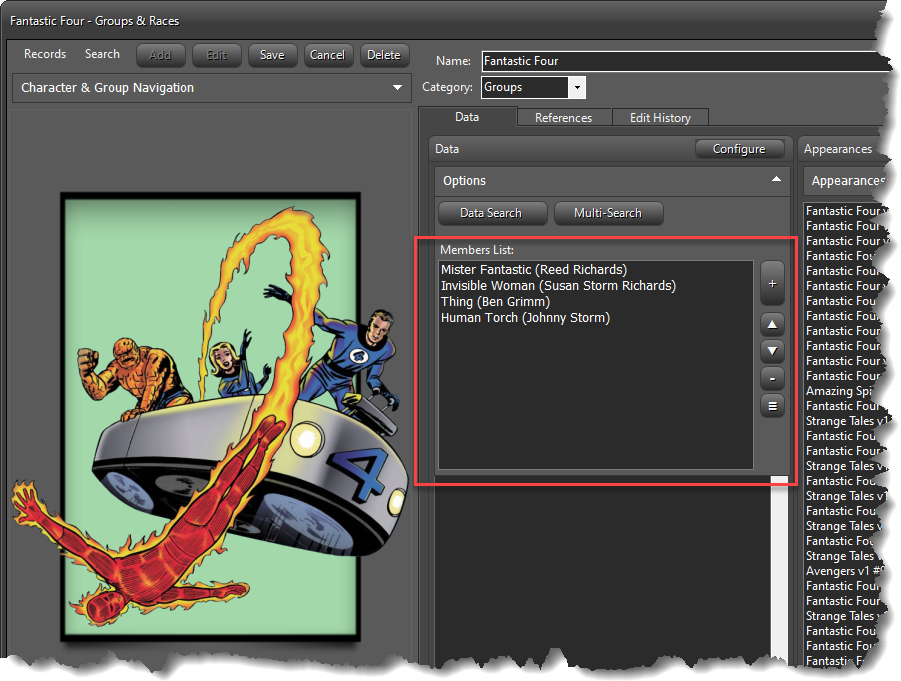
Clicking  opens the Add Characters dialog, similar to the Issues
form.
opens the Add Characters dialog, similar to the Issues
form.
Follow the same instructions as adding Characters to Issues. The members added here will then be available for auto-entering on the Issues form when the particular team is selected. For instance, when Fantastic Four is added to the Characters list on the Issue form, a dialog will pop up asking if you want to also add members. Choosing yes will automatically add the members shown in the list above. This saves valuable time on data entry.
The Member list can then be easily updated when team members change.